WP Relocate

Requires at least: 3.5
Tested up to: 3.6-trunk
License: GPLv2 or later

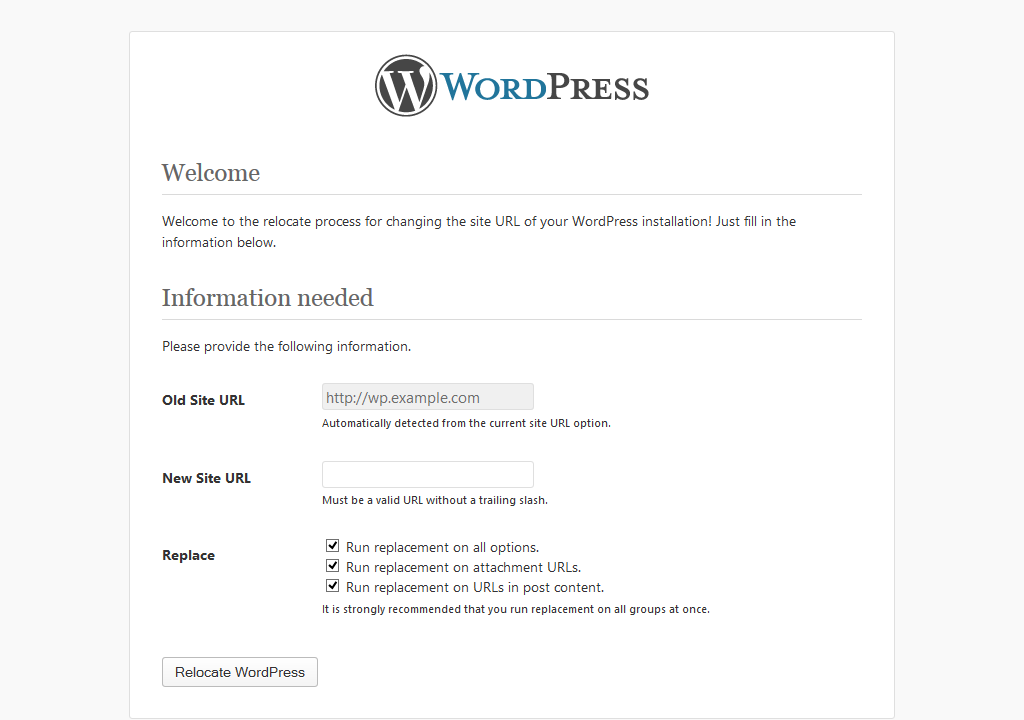
A simple interface for replacing the Site URL and all options, attachment URLs, and references to the site URL in post content.

Installation

This plugin is installed like any other.

  1. Upload the entire relocate/ folder to the wp-content/plugins directory.
  2. Activate the plugin through the "Plugins" menu in WordPress.

Usage Instructions

Typical usage

You must have administrator privileges (or at least the manage_options capability).

  1. Log in as a user with sufficient capabilities.
  2. Navigate to Tools -> Relocate.
  3. Enter the new URL of your site (e.g. http://www.mynewdomain.com).
  4. Leave all boxes checked. Click Relocate WordPress and you're done!

Advanced usage

Completing a migration

If you previously moved your files to a new server and plan on using a new domain -- you can use this plugin to finish the job.

  1. You must declare the RELOCATE constant in your wp-config.php:
    define('RELOCATE', true);
  2. WordPress will let you log in1 at the new domain, assuming it has been correctly set up (see "Domain and path readiness" below).
  3. The site URL has already been changed to http://www.mynewdomain.com.
  4. Change the "old" URL to your site URL from before migration (e.g. http://www.myoldsite.com).
  5. Use http://www.mynewdomain.com as the "new" URL with which to replace.
  6. Leave all boxes checked. Click Relocate WordPress and you should be finished!
  7. Don't forget to remove or comment out the RELOCATE constant from your wp-config.php!
Fixing a site URL mistake

Let's suppose you used another method or this plugin to change from http://www.example.com to http://new.example.comasdf -- an accidental mistake. You now need to fix this.

  1. Use the line
    define('RELOCATE', true);
    in your wp-config.php file.
  2. You should be able to log in2 to the old site (http://www.example.com) and access the plugin from there, assuming your domain and server still respond to the old hostname.
  3. The RELOCATE constant, when true, will allow you to specify the "old" URL to find. Change the old URL from the default value to http://new.example.comasdf (the error you need to revert).
  4. Use your past site URL, http://www.example.com to revert your past changes.
  5. Leave all boxes checked. Click Relocate WordPress.
  6. Don't forget to remove or comment out the RELOCATE constant from your wp-config.php!

After making the correction, you can go back and use the plugin to re-run the process correctly.

Domain and path readiness

Before using the plugin, it is imperative that the new domain and path are ready. This means:

If you are migrating a live site to a real domain (e.g. new.example.com)
  1. Set an appropriate host (A, AAAA, CNAME) record for the domain name to resolve to the right server.
  2. Configure Apache or nginx (or your other HTTP daemon) to respond to that hostname and point it to the WordPress installation path (e.g. /home/myuser/public_html/wordpress).
If you are using a development environment with an imaginary domain (e.g. wp.local)
  1. Set your hosts file so that your imaginary domain resolves to the right server.
  2. Configure Apache or nginx (or your other HTTP daemon) to respond to that hostname and point it to the WordPress installation path (e.g. /home/myuser/public_html/wordpress).

Screenshots

The user interface


  1. If WordPress will not allow you to log in, you can go directly to the plugin at http://www.mynewdomain.com/wp-content/plugins/relocate/interface.php and run through the procedure without logging in. 

  2. Same as #1, but use the old domain: http://www.example.com/wp-content/plugins/relocate/interface.php